Friday, August 31, 2012

Kitchen Boycott: Chicken Tortilla Soup


This recipe was super quick to prepare and delicious! Will definitely make again and again! Plus had tons left over for lunches :)

Ingredients:

Adapted from The Six Sisters' Stuff

2 chicken  breasts- boneless/ skinless
2 cans Ro-Tel  (I used one can and then added diced fresh tomatoes)
1 can black beans, rinsed and drained
1 can kidney beans, rinsed and drained
1 can corn or 1 c frozen corn
1 onion, chopped
2 cans low-sodium chicken broth
1-2 cups of water
1 Tbsp garlic powder
1 Tbsp chile powder
1 Tbsp ground cumin
1 Tbsp dried cilantro
tortilla chips (for topping)
sour cream (for topping)
shredded cheddar cheese (for topping)

Step 1: Place beans, corn, chopped onion, rotel, chicken broth, water and spices in Crock-Pot.

Step 2: Place chicken on top (make sure they are covered by some liquid)

Step 3: Cook on Low 8-9 hours or on High 6-7 hours. Take chicken out and shred, then mix back into soup.

Step 4: To serve, top with tortilla chips, sour cream and cheddar cheese. Enjoy!

What did I do with my time away from the kitchen?: Hung out with my friend Priscilla :)

Thursday, August 30, 2012

Kitchen Boycott: Fresh Spaghetti Sauce


       Tomatoes were everywhere in my kitchen...fridge, counter, table... I needed to do something to take back my kitchen. So what's a girl to do? I made fresh tomato sauce :) Of course I did it on a large scale (I wasn't kidding when I said they were EVERYWHERE) and plan to freeze most of it for future recipes, but you can make enough for one meal if you like. This recipe was perfect. Just place all ingredients in the crock-pot and let it simmer all day. No work of babysitting a pot on the stove or heating up the house.


I eye-balled the amounts I put in the crockpot (since I did a very large batch). So here are some suggested ingredients amounts (6 servings):


8 lbs tomatoes, skin removed and diced
1/4 c. fresh basil, chopped
1 onion, minced
1 green pepper, chopped
3 cloves garlic, minced
1/8 c/ olive oil
Splash of red wine (and a glass for yourself !)
tomato paste
salt and pepper to taste


Step 1: Prep tomatoes by removing skin (see freezing tomatoes tutorial) and dice into smaller chunks. Add to crock-pot.

Step 2: In small pan, saute pepper, garlic, and onion until tender. Add to crock-pot with remaining ingredients.

Step 3: Simmer on low for 6-8 hours. Stir every 3 hours.

Step 4: Pour over your favorite pasta. Top with parmesan cheese.

 Enjoy!

What did I do with my time away?: Sophie and I played with play-doh :)


Crafts: DIY Play-doh


       Sophie is now at the age where she wants to touch and get into everything. I can't blame her, because she is at the age of discovering everything. I needed something to help occupy her time (while I make dinner), promote creativity, and that's an age appropriate sensory activity...so what better than Play-doh?!
       Why spend your money on  pricey store bought doh when you can make it at home?


Ingredients:

1 c. flour
1/4 c. salt
3 tsp. white wine vinegar
2 Tbs. olive oil
1/2 c. water
food coloring


Step 1:  Mix dry ingredients in a small sauce pan.

Step 2: Whisk in water on low heat. Then add the vinegar, followed by the oil. Continue to mix on low heat until dough consistency forms. (add slightly more flour if too oily)

Step 3: Add food coloring of choice. Kneed until well mixed.

Have fun playing!

To Store: Place doh in air tight container in fridge.

Monday, August 27, 2012

First Day of School


    Today was my first day back on campus and wow was it a busy day. Started off the morning with the alarm going off at 6:00am (got up 4 times with April during the night), mad dash out the door (thanks to patient husband who helped me with the kids), first day of daycare and a full load of classes. Even with all that work to get there, It was really nice to be back on campus. I have been working on my bachelors degree in Secondary Social Studies Education for 6 years. I had to lighten up or take off a semester now and then to have my daughters (who conveniently had due dates around finals or shortly there after). So my goal of school had to be put on hold. Well now two kids and a husband later, I am now on my final semester on campus and it feels great. Then off to student teaching in Fall 2013 (missed a deadline so I'll have spring 2013 off, oops!) and ill be a college graduate with my teaching license. That day can't come soon enough.
     I discovered my calling to teach back when I was in high school. I had some really great inspiring teachers who were passionate about their content areas and touched the lives of their students. Whether or not you want to admit it, a teacher has touched your life too.  Think for a moment.. How many Nobel prize winners can you list? or Supreme Court Justices?.. I bet not many off the top of your head. Now let me ask you this... List 5 names of teachers you had growing up?  I bet some come to mind right away!
    A Professor of mine (who I aspire to be) read our class a few statistics from a randomly selected nation wide survey of 11th graders about social studies. The students where asked these questions: 
            1.  What lies directly north of the United States? 48% of  the students questioned didn't know the name of Canada and most thought it was the Pacific Ocean.
            2.  What country did the 13 colonies free themselves from during the Revolutionary war?  Less than 40% knew the right answer .. England.
            3. Who is Joe Biden?  Only 34% knew that he was the Vice-President.

These were some of many questions that students simply did not know. May I remind you that these are 11th graders! This kids are about to go out into the world in less that a year. This just breaks my heart.  I wish that this generation of kids will realize that life happens and education gives you choices in life. They are our future. That's why I hope when I get a teaching job I can change this, and empower students to find their drive to learn.    Oh enough about my ranting about education. Moral of the story.. I'm glad to be back learning :)


Thursday, August 23, 2012

Garden Zucchini-Chicken Casserole

     So I'm always looking for new ways to use up all of our garden Zucchini. We are getting a little sick of Zucchini and let me say, this recipe is perfect and you don't even notice the zucchini!  I will definitely make this all winter long with our frozen zucchini :)


Ingredients:

Recipe adapted from The Six Sisters Stuff

1 Tbl. olive oil
1/2 c. onion, diced
4 c. zucchini, diced (I left skin on)
salt and pepper
garlic powder
2 chicken breasts, cooked and shredded
1 can cream of chicken soup
1 c. sour cream 
1/2 c. milk
1 c. cheddar cheese, shredded 
1 (8 oz.) pkg. stuffing mix 
1 stick butter, melted


Step 1: Heat olive oil in a medium skillet over medium heat.  Add the onion and zucchini and saute until tender, about 5-8 minutes; season with salt, pepper, and garlic powder. 

Strep 2:  Meanwhile, combine the cream of chicken soup, sour cream and milk.  Add the shredded chicken, shredded cheese and cooked zucchini mixture.  

Step 3:  Combine the stuffing mix with melted butter.  Spread half of the stuffing mix into the bottom of a 9x13 casserole dish.  Cover with soup mixture and spread evenly.  Sprinkle the remaining stuffing mix over the top.  
Step 4: Bake, uncovered, at 350 degrees for 30 minutes.  Serves: 6-8


Poor Baby

     So yesterday I took little April into the doctor for her routine 2 month check up. I didn't think April had anything of concern, just a little problem latching correctly with nursing (fixable right?). My little girl is healthy in every way except she has Thrush (ugh!). It's very common, but can be painful. No wonder she was having problems eating! And on top of it all, she got her first round of shots. Poor girl! So yesterday was tough for her and she is still feeling pretty low today too. I see many snuggles in store for me and her today.

It always breaks my heart when one of my girls are feel sick.
Feel better sweetie!


Wednesday, August 22, 2012

Mommy's Night Out

      Every now and then I get a night off (greatly needed) and tonight I spent it with my friend Priscilla. What is it about a night of girl-talk and cocktails that totally frees your mind and brings you back to who you are?(before babies and marriage).
      I am so blessed to have many great long-term girlfriends in my life, but Priscilla has been the one who has been through the thick and thin with me. We met during our freshman year of college and instantly clicked. She has been by my side through our "party phase", crazy adventures, heartbreak, babies, and stood by my side as I married the love of my life. We don't get together as often as we would like, but whenever we do, it's like a day has never passed. Love you Priscilla!


Tuesday, August 21, 2012

Kitchen Boycott: Meal Planning

Meal Planning. Meal Planning. Meal Planning....

      Oh what can I say about meal planning?.. BEST DECISION EVER!!!! Before I started meal planning, I was going to the store on average 3-4 times a week just for groceries. No joke! This doesn't include last minute diaper and ice cream runs (my husband has a sweet tooth). I didn't think about dinner until about the girls' nap time and would spend 20 minutes digging through the cupboards to see what I had. Well, no more!  
     Since I've started on my mission to spend less time in the kitchen ("kitchen boycott"), I have noticed that we have saved money in the process. We use up less gas from cutting out extra trips to the store.  We now tend to buy less unnecessary items (yes my husband still wants candy and ice cream here and there). We stay somewhat on budget and we now use up what we have on hand. Yay for less half used boxes of noodles and random canned goods.

    Meal planning has so far saved me sssoooo much time. Not only in the kitchen, but also in the store. Planning ahead forces me to make clear lists, which helps me to get through the store faster. At home there is no guessing what to eat, because I now have a list on the fridge of what our menu for the week is.

    I only do meal planning a week at a time. My goal is to get it up to two weeks, but baby steps. I've read about other women who plan out a whole month at a time (this just blows my mind) and they do most of their prep work in ONE day and use their freezer to accomplish it. They call it "Once A Month Cooking" or OAMC. I hope to do this on a smaller scale and work my way up.


How I do my meal planning:
      -  I first ask requests from my husband
      -  I look to see what ingredients we have on hand.
      -  Next I pick out my recipes (I tend to search pinterest for inspiration and ads to see sales)
      -  I also look for similar ingredients (especially with perishable items).
      - Write out what you need for each meal and how much needed.
      - Write out list for store ( Lists lists lists..I know I'm a list person. Keeps me organized)
      - Lastly, I pick which meals are for what night and post them where both Jeff and I can see :)

I hope this inspires you to meal plan and spend less time in your kitchen :)

Monday, August 20, 2012

Kitchen Boycott: Mini Corn Dogs

     The Minnesota State Fair is right around the corner! So excited! Jeff and I go every year (we're going on Friday!!).  Just thinking about the state fair today put in the mood for corn dogs. I know freezer ones can't even come close to how good the ones at the fair are, but I wanted them anyways. So I was at the store doing my weekly shopping trip when I came upon the freezer section. I was in shock..around $7.00 for a box of frozen corn dogs. Why would hot dogs wrapped in corn meal batter cost so much? I refused to pay that much for something I could make at home cheaper.  So I got my pack of hot dogs and corn bread mix and headed home.


      I decided to make mini corn dogs. These are the perfect size to make a big batch and stick them in your freezer. That way you can take them out for a quick kid-friendly meal.

Mini Corn Dogs
Yields: 12 corn dogs ( used muffin pan. Would get more if you use a mini muffin pan)

1 box cornbread muffin mix ( I used Jiffy)
2 hot dogs (3 hot dogs if using mini muffin pan)
1 egg
1/3 cup milk
A squeeze of honey

Step 1: Preheat oven to 400 degrees F.

Step 2: Cut each hot dog into 6 pieces. Place each piece in a greased muffin pan.

Step 3: Prepare corn bread mix according to package. Mix in a little honey to sweeten.

Step 4: With a spoon add a portion of the cornbread batter around the hot dogs in each cup. (about 2/3 covering the hot dog).

Step 5: Place in a 400 degree oven for 12-15 minutes (less time if using mini muffin pan) until golden. Serve with ketcup and enjoy!

To Freeze (quick lunch later) allow to fully cool. Place mini corn dogs in a Ziploc freezer bag. When ready to eat, heat in oven on 350 degrees for 15 minutes or heat in microwave. 


Sophie Approved!


What did I do with my time away from the Kitchen?: Ok you got me, this requires time in the kitchen the first day. But, now I have some in the freezer ready to go. So I will enjoy time away another day :)

    Today I got an extra surpise! I glanced in the Goodwill today (right next to my grocery store) and found a new pair of shoes for $1.49! Never know what fun hidden treasures are in there :)


Friday, August 17, 2012

Kitchen Boycott: Crock-Pot Shepards Pie

  So I found myself this morning thinking "What am I going to make?" I still needed to make my upcoming weekly meal plan and shopping. But with two little ones and too much on the to-do list today, going to the store was not an option. So I thought about what I had that was quick on hand. ...Potatoes, frozen veggies, and hamburger... hmmm.. Shepards Pie! 
     I know Shepards Pie in the Crock-Pot sounds wierd, but I'm going to try it. What is great about this meal is that all these ingredients are stuff I always usually have on hand. So it makes for a great 'go-to' meal.
           
Crock-Pot Shepards Pie
Adapted from Stephanie O'dea

Ingredients:
-3 cups leftover mashed potatoes
-1 lb ground turkey or beef (I used beef)
-2 cloves garlic, chopped
-2 cups frozen vegetables (I used corn and green beans)
-1 medium onion, chopped finely, or 1 T onion flakes
-1/2 tsp seasoned salt
-1/2 tsp onion powder
-1/4 tsp black pepper
-1/4 tsp paprika
-1 cup water
-2 cups shredded cheese

Step 1: Brown your meat**  on the stove with the onion. Toss with spices and garlic. (Due to my abundant graden supply, I added once again some chopped green peppers while frying).
Step 2: Spray inside of your Crock-Pot with cooking spray.
Step 3: Place the meat in the bottom of the pot. Stir in your veggies and add a cup of water.
Step 4: Add the cheese. Then press down the mash potatoes on tops and sprinkle with paprika.
Step 5: Cover and cook on LOW for 6 hours or HIGH for 3 hours. The remove the lid and cook for additional 30 minutes. This allows the potatoes to get crusty and a bit brown, like it would in the oven (yay for not heating up the house in the summer!).
This was the perfect one pot meal! Sophie (my picky eater) actially ate it!
** Time saving tip: Have a couple of pre-portioned Ziplock bags of cooked ground beef in your freezer. Makes for less time in the kitchen on days you need to assemble meals quick. (taco salad, casseroles, etc)


Time preparing this meal: 10 minutes (while Sophie ate breakfast)

What did I do with my extra time away from the kitchen?: Took a long needed nap! :) Newborns are fun, but not so fun in the sleep department..


Photo from www.lwhancock.com
My basic camera didn't do this delicious meal justice!

Thursday, August 16, 2012

Kitchen Boycott: Crock-Pot Teriyaki Chicken

   There are so many days I find myself spending half my day (or so it feels) in my kitchen making meals. Between rummaging through my cupboards and fridge, preparing ingredients, and cooking meals; There is little time left for what I want to do.  So today is my first day on my journey to get out of the kitchen (or spend as little time as I can) and spend more time with my family.
    To accomplish this goal today, I dusted off my trusty Crock-Pot and tried a new recipe! Today I made Teriyaki Chicken over Rice. SUPER EASY! The best thing about this recipe too is that you can prep it before hand and freeze it all in a Ziploc freezer bag (my new best friend). Thaw and then dump it all into your slow cooker! Dinner is ready when you come home and only one bag to throw away! Easy clean up.

Crock-Pot Teriyaki Chicken

Makes two meals with 4 servings each.
(I made one today in the crock-pot and saved the other in the freezer for an easy meal later this month!)


What you need:
- Ziploc freezer bag (to store second meal)
- White rice
- 1 large can pineapple (undrained)
- 1 large onion (cut into large chunks)
- 1 medium bag of carrots
- 4 cloves garlic
- 1 green pepper- chopped in large chunks (optional: I have tons in the garden to use up)
- 4 chicken breasts- cut in half (I used tenderloins instead)
- 1 cup teriyaki sauce
- Ginger powder to taste

Step 1: Cut up all veggies
Step 2: Label extra bag with directions and content.
           -Add 1/4 cup teriyaki sauce
           -Cook on High-4 hours/ Low 8 hours
           -Serve over rice
Step 3: Add meat to bag and crock-pot
Step 4: Divide veggies and all other ingredients between the bag and cock-pot.
Step 5: Start crock pot for desired time. Press air of our bag, seal and freeze for a later meal (lay flat to freeze)


Step 6: Serve over hot rice when done.

This meal took me 10 minutes to prep. I now have a meal ready with barely any work and PLUS a meal with no prep later this month :)
 **When ready to use the frozen meal. Move to refrigerator to thaw (enough to slide out of bag), place contents of the bag in crock pot, turn on, and dinner will be ready when you get home!

What I did with my extra time away from the kitchen?:  Took girls for a walk and spent extra time reading Sophie books :)

Wednesday, August 15, 2012

Crock-Pot Love

    With the fall semester starting up in less than two weeks, I had a realization that my busy life is going to get even busier (hard to believe, I know).  I'll have early mornings, packing lunches, rush to and from daycare, classes, taking care of two little girls, homework, and housework. After all that in a day, the last thing on my mind will be the important age old question... What's for dinner?... There is nothing worse then running around all day, come home, and then have to rummage through the fridge and slave over a hot stove. Growing up my mom (having four busy, hungry girls of her own) worked full time and always managed to have dinner ready when she got home. How did she do it? The Crock-Pot (or slow cooker)
    I've had a Crock-Pot for years. I'd bring it out and use it here and there for making pot roasts or for appetizer meatballs when entertaining. With busy days ahead and no time to cook, I think I shall make my Crock-Pot my new best friend :)
   My mission is to find new and exciting ways to make meals with little work. Less time in the kitchen means more time with my family and I'm all for that. So I'm now on the hunt for good crock-pot recipes and make ahead freezer meals. Of course, when I find good recipes I'll share them :)

I think I may just boycott my kitchen :)

Tuesday, August 14, 2012

Freezing Tomatoes


  Well it's that time of the summer when our tomato plants are going crazy with ripening tomatoes. At first I could keep up with making fresh salsa and delicious BLT sandwiches, but now I found my counter top filled with tomatoes. We couldn't keep up! So what to do?...Freeze them of course!
    I know what your thinking, it's probably a lot of prep work right? ..wrong! It was very easy to get them freezer ready. If I can do it with a toddler around my legs and a crying baby in the background, you can too.

Freezing Tomatoes
(for future cooking because the consistency will change)

Step 1: Wash tomatoes in cool water.

Step 2: Cut the tops off (the stems)

Step 3: Boil tomatoes for 30 seconds in a large stock pot. You will see the skin starting to separate from the tomato.

Step 4: Take tomatoes out of the pot and put instantly in a bowl with ice water to stop the cooking.

Step 5: Peel away the skin and discard. Slice into large chunks is you wish.

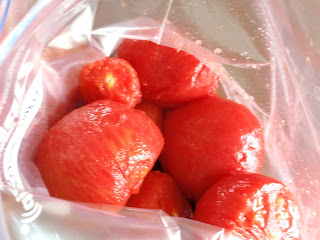
Step 6: Place into Ziploc freezer bags (they are a little thicker) and label. I put a few a smaller portions for easy grab and go for baking dishes. Let tomatoes cool before sealing. Freeze and your done!


Monday, August 13, 2012

A little look at summer

       During the girls' nap time I decided to clean up some old pictures off my computer and of course, got distracted looking at all of the new ones from this summer. So I thought I'd share some photos of our activites this summer :)
At the park


Sophie on fathers day


Sophie with Daddy at the cabin

Enjoying the Splash Pad
Art in the Park

Two months old!

With Mommy on the slide

Pumpkin Pumpkin Pumpkin


     Last night Jeff picked our first two pumpkins from our garden. Yay! I know it's still summer, but this made me instantly in the mood for fall (especially fall goodies!).  So today I made homemade pumpkin bread with FRESH pumpkin. This was my first time using is, since I usually use the canned stuff, but I have to say it's delicious!
     I thought making pumpkin puree would have been hard, but nope, it was pretty easy. I do admit it took me a little longer then I though (with multiple interruptions from the kiddos), but now that I got the first pumpkin down, I'm sure the next one will go faster.

Fresh Pumpkin Puree

Step 1: Cut the tops off the pumpkin, just like if you were making a jack 'o' lantern.

Step 2: Scrape out all the gooey insides and seeds
(Save the seeds! Roasted seeds are the best)

Step 3: Cut the pumpkin into large chunks, but keep the skin on.

Step 4: Place pumpkin skin down on a baking sheet. Bake at 350 degrees for about 45-50 minutes, or until tender with a fork.

Step 5: Take pumpkin out of the oven. Remove skin and place the cooked pumpkin in a food processor. Blend until it starts to become smooth, but not runny.

Step 6: Use in your favorite pumpkin recipes or freeze in a Ziploc bag for future use.


Pumpkin Bread    
Adapted from www.simplerecipes.com (great site for new recipes!)
  • 1 1/2 cups flour
  • 1/2 teaspoon of salt
  • 1 cup sugar
  • 1 teaspoon baking soda
  • 1 cup pumpkin purée (can be canned)
  • 1/2 cup oil ( I used Veg. oil)
  • 2 eggs, beaten
  • 1/4 cup water
  • 1/2 teaspoon nutmeg
  • 1/2 teaspoon cinnamon
  • 1/2 teaspoon allspice
  • 1/2 cup chopped walnuts
Step 1: Preheat oven to 350°F. Sift together the flour, salt, sugar, and baking soda.

Step 2: Mix the pumpkin, oil, eggs, 1/4 cup of water, and spices together, then combine with the dry ingredients, but do not mix too thoroughly. Stir in the walnuts.

Step 3: Pour into a well-greased 9x5x3 inch loaf pan.

Step 4: Bake 50-60 minutes until a thin skewer poked in the very center of the loaf comes out clean. Turn out of the pan and let cool on a rack.

Saturday, August 11, 2012

Home Sweet Home

    After four months, Jeff and I are finally getting settled into our new house. Wishing and talking about buying a house was all the we talked about for almost three years and it still seems unreal that our dream came true. What is it about a house that's "yours" that makes it a home? I have been moving around and renting the past 5 years and nothing felt like home until now.
    There is something comforting about knowing that we now have a place that our children can call home. A place where their childhood memories will be made with birthdays, holidays and the little moments. A place where Jeff and I can make our own and put our personal touches on. It's a place that's ours and a home that we build together :)

      The first thing Jeff and I (well mainly Jeff) did was put in a garden in the back yard. In our previous apartment we were lucky enough to have a large deck, so we filled it with pots full of veggie plants. Well now that we have a pretty good size yard, we have a 16'x 32' garden! We planted zucchini, summer squash, cucumbers pumpkin, watermelon, cantelope, sweet corn, green beans, tomatoes, green onions, white onions, radishes, sweet and hot peppers, strawberries, and lettuce.
      Finally our garden is in full swing of veggies, so throughout the month I'm going to share some of my favorite recipes that I'm trying out to eat up all of our goodies (although most of it has gone into our freezer since everything is producing so fast!).  This is a great link on how to freeze your garden veggies.. www.pickyourown.org


home grown

Kitchen fresh herbs


Some of our many veggies